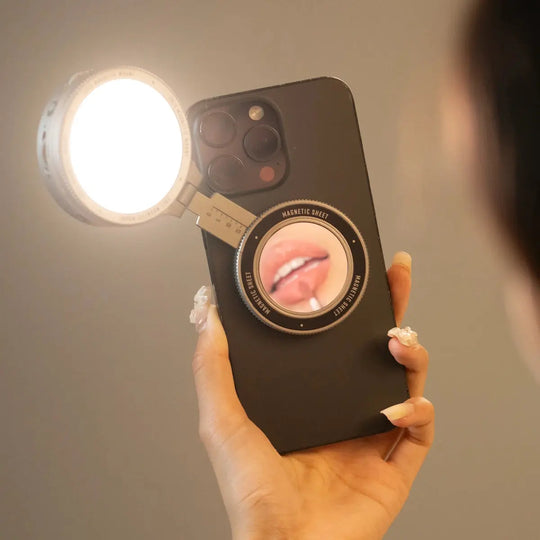
Unlock Your Content's Brilliance: Discover the Ultimate LED Lights for Stunning Creations!
Lighting is one of the most critical elements in content creation, influencing the mood, clarity, and overall aesthetic of videos and photographs. Poor lighting can lead to unflattering shadows and dull visuals, while good lighting can elevate even the simplest of setups. This is where LED lights for content creators come into play. With their versatility, energy efficiency, and ability to produce bright, clear light, LED lights have become a favorite among content creators. In this article, we will explore the different types of LED lights tailored for various content creation needs, the advantages they offer, and how to choose the right ones to enhance your creative projects.

Understanding LED Lights: The Basics
LED lights, or Light Emitting Diodes, have revolutionized the lighting industry. Unlike traditional incandescent bulbs, LED lights consume less energy and have a significantly longer lifespan. They produce less heat, which is especially beneficial for long recording sessions, ensuring that you remain comfortable while shooting. For content creators, the primary advantages of LED lights include their adjustable brightness, color temperature options, and portability. The ability to manipulate these factors allows creators to achieve the desired look and feel for their content, whether they're filming in a studio or on location. Additionally, LED lights are often more compact and lightweight, making them easier to transport and set up wherever creativity strikes.
Types of LED Lights for Content Creators
When it comes to content creation, not all LED lights serve the same purpose. Understanding the different types can help you make informed decisions on which lights to incorporate into your setup. Key lights, fill lights, and background lights each play a distinctive role in achieving professional-quality lighting. Key lights are primarily used to illuminate the subject, fill lights help balance shadows, and background lights add depth and interest to the scene. Each type can be adjusted in terms of brightness and color to fit the specific needs of your content, allowing you to create a visually stunning final product.
Key Lights
Key lights are your primary source of illumination in videos and photography. They are typically placed at a 45-degree angle to the subject to create dimension and depth. A well-placed key light will highlight the features of your subject, making it essential for interviews, tutorials, and vlogs. When setting up a key light, consider the height and distance from your subject to avoid harsh shadows. A personal experience I had with key lights was during a friend's live-streaming event; we experimented with different angles and brightness levels, ultimately finding a setup that made the subject shine while keeping the background softly lit.
Fill Lights
Fill lights play a crucial role in reducing harsh shadows created by key lights. By illuminating the darker areas of the scene, they help achieve a balanced exposure. Proper placement of fill lights can create a natural look, softening the shadows without overpowering the key light. It's often recommended to position fill lights at a lower intensity than the key light to maintain the focus on the subject. My friend, who is a budding photographer, once shared how adjusting her fill light made a dramatic difference in her portraits, allowing her subjects to look more vibrant and less washed out.
Background Lights
Background lights are used to enhance the overall aesthetic of your content. They can create depth, highlight textures, or add color to the backdrop, making your setup more engaging. Strategic use of background lights can draw viewers' attention towards the subject while also adding a creative flair to the visuals. For instance, using colored LED lights behind a subject can create a stunning contrast that elevates the entire composition. A memorable moment I experienced was during a friend's video shoot where we utilized background lights to create a gradient effect, transforming an ordinary setting into something visually spectacular.
Choosing the Right LED Lights for Your Needs
Selecting the right LED lights involves considering factors such as brightness, color temperature, and portability. Brightness is crucial, as you want your lights to adequately illuminate your subject without being overpowering. Color temperature impacts the mood of your content; warmer tones create a cozy atmosphere, while cooler tones can give a more modern, clean look. Portability is essential for creators who work in various locations, as lightweight and compact lights make transportation easier. When contemplating these factors, think about the type of content you’ll be creating and the environment in which you’ll be shooting. A friend of mine switched to portable LED panels for her outdoor shoots and noticed a significant improvement in her lighting quality, allowing her to work more flexibly and creatively.
Tips for Setting Up LED Lights
To achieve optimal lighting results, arranging your LED lights thoughtfully is key. Start by placing your key light at an angle that complements your subject’s features. Use reflectors or white surfaces to bounce light where needed and soften harsh shadows. Experiment with the distance of your fill light from the subject to find the right balance. For background lighting, consider using multiple lights to create depth and interest. Always test your lighting setup before recording to make necessary adjustments. I learned the importance of testing setups firsthand during a collaborative project where tweaking our lights before filming made all the difference in the final product.
Maximizing Your Lighting for Content Creation
In summary, LED lights are an invaluable tool for content creators looking to enhance the quality of their work. Understanding the types of LED lights available and how they function can significantly improve your lighting setup, resulting in more professional-looking videos and photos. Remember to consider brightness, color temperature, and portability when choosing your lights, and don't hesitate to experiment with different setups to discover what works best for your creative endeavors. With the right lighting, your content can truly shine and capture the attention of your audience.


