
Unlock Crystal Clear Shots: The Ultimate Guide to Camera Lens Cleaning Secrets!
Maintaining the cleanliness of your camera lenses is crucial for achieving high-quality images. Dirty lenses can lead to a myriad of issues such as blurred images, reduced contrast, and even unwanted artifacts in your photos. Imagine setting up for the perfect shot only to discover that smudges or dust are ruining your composition; it’s a photographer’s nightmare. This is where an easy-to-use digital camera lens cleaning kit comes into play. With the right tools at your disposal, you can ensure that your lenses remain spotless, allowing you to capture the world in stunning detail.
The Importance of Cleaning Your Camera Lens
Regular lens cleaning is essential for anyone serious about photography. Over time, lenses can accumulate dirt, dust, and fingerprints, all of which can significantly affect the quality of your images. A study conducted by photography experts highlighted that even minor smudges can reduce image contrast by up to 30%, leading to dull and lifeless photos. This is especially pertinent for professional photographers who rely on pristine image quality for their work. Not only does a clean lens enhance the sharpness and clarity of your photographs, but it also helps in maintaining the integrity of your lens over time. When I first started photography, I neglected this crucial aspect and often found my images lacking the vibrancy I aimed for. Once I incorporated a regular cleaning routine, the difference was night and day.
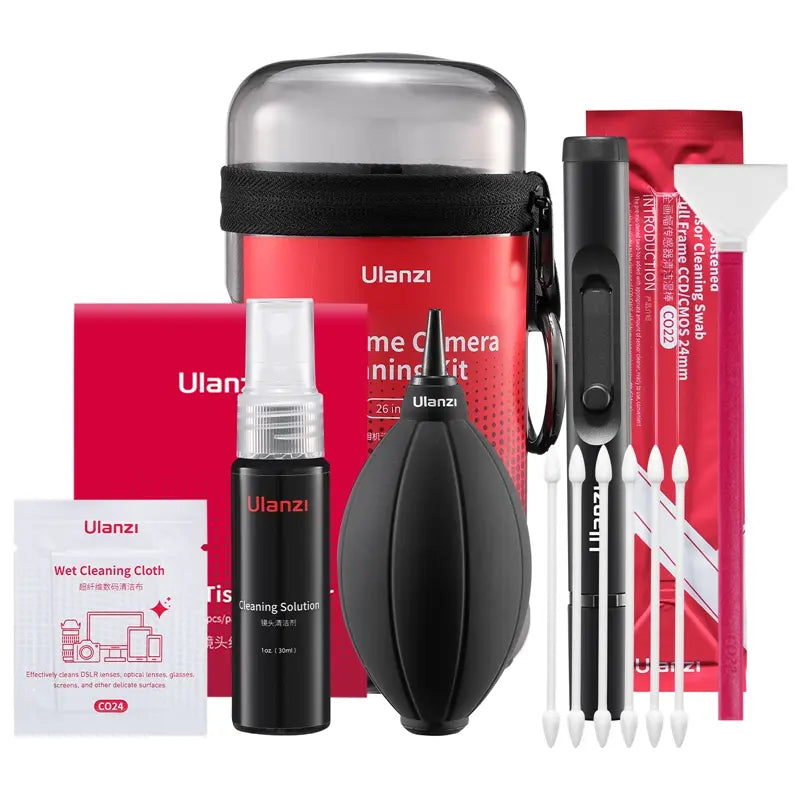
What is a Digital Camera Lens Cleaning Kit?
A digital camera lens cleaning kit is typically composed of several specialized tools designed to keep your lenses clean and scratch-free. Most kits include microfiber cloths, which are gentle on the glass, a cleaning solution formulated specifically for optics, and brushes that can effectively remove dust without scratching the surface. The advantage of using a dedicated cleaning kit over household items cannot be overstated; while a paper towel might seem convenient, it can leave behind scratches or lint. I remember a friend who used a regular cloth to clean their expensive lens, only to end up with a permanent scratch that altered their photography experience forever. Investing in a proper cleaning kit ensures your lenses are treated with the care they deserve.
Step-by-Step Guide to Cleaning Your Camera Lens
Cleaning your camera lens effectively is a straightforward process when using a digital cleaning kit. Here’s a step-by-step guide to help you through it:
- Gather Your Supplies: Start by collecting your digital camera lens cleaning kit, including the microfiber cloth, cleaning solution, and brush.
- Remove Loose Dust: Use the brush to gently sweep away any loose dust or debris from the lens. This step is crucial as it prevents scratching during the cleaning process.
- Apply Cleaning Solution: Lightly spray the cleaning solution onto the microfiber cloth—never directly onto the lens. This helps to avoid excess moisture pooling and potentially damaging internal components.
- Wipe the Lens: Use the cloth to wipe the lens in a circular motion, starting from the center and working your way outwards. This technique ensures that any smudges or fingerprints are removed effectively.
- Inspect the Lens: After cleaning, hold the lens up to the light and inspect it for any remaining spots. If necessary, repeat the cleaning process.
- Store Properly: Once clean, cap your lens to protect it from dust and scratches until your next shoot.
While cleaning, always handle the lens by its edges to avoid fingerprints on the glass. Also, be patient; rushing can lead to mistakes that could damage your equipment. I recall a time when I was cleaning my lens in a hurry, and I accidentally caused a small scratch that I still notice in some of my photos. Taking your time pays off!
Best Practices for Lens Care
In addition to regular cleaning, there are several best practices to ensure the longevity of your camera lens. Always store your lenses in a padded case to protect them from impact and dust. When not in use, keep the lens capped to prevent any accidental scratches. Avoid exposing your lenses to extreme temperature changes, as this can create condensation that may damage internal components. If you find that your lens requires deep cleaning that you’re uncomfortable performing, don’t hesitate to seek professional cleaning services. They have the expertise and tools to handle specialized equipment safely.
Essential Tips for Keeping Your Lens Pristine
In summary, maintaining the cleanliness of your camera lens is vital for capturing the best possible images. An easy-to-use digital camera lens cleaning kit is an invaluable tool for any photographer, ensuring that your gear stays in top condition. By adopting regular cleaning habits as part of your photography routine, you’ll not only improve the quality of your shots but also prolong the life of your lenses. Remember, a clean lens is a happy lens, and it’s the first step towards unlocking crystal clear shots!